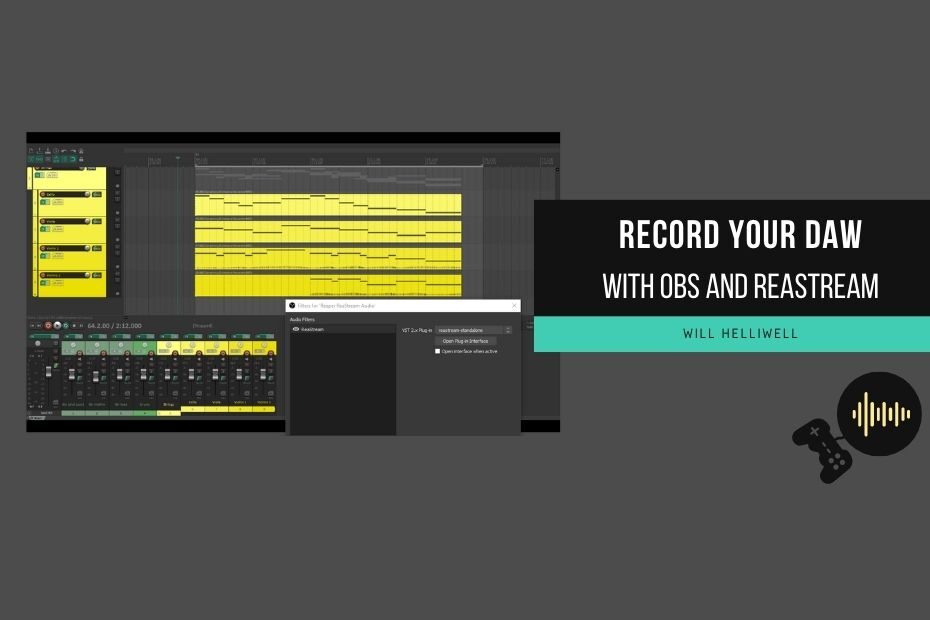
This article will guide you through how to capture a screen recording of your audio software without any of the difficult setup or latency usually associated with recording your DAW. This means you’ll be able to easily capture and share videos on social media but also be able to stream directly to platforms such as Twitch.
I previously made an article and video about this very issue called STREAMING AUDIO GUIDE FOR OBS AND SKYPE. This article is an updated version and should have all the same functionality but should be a lot easier to implement. We’ll leave out the Skype part and just get your DAW’s audio into OBS.
What you’ll need
- A Windows PC
- Your DAW of choice. Reaper for me
- ASIO drivers, with or without an external soundcard
- OBS to record your screen
Getting Started
ReaStream is a VST plugin that comes with Reaper. It sends audio and MIDI data over a local network in real-time. We’re going to use it to send audio from our DAW and then use the same plugin to receive the data in OBS.
Assuming you already have OBS installed, the first thing we need to do is download ReaStream. Download either the 32-bit or 64-bit version of ReaPlugs depending on your DAW. When you run the reaplugs.exe file, you can either install everything or just the ReaStream stereo plugin.
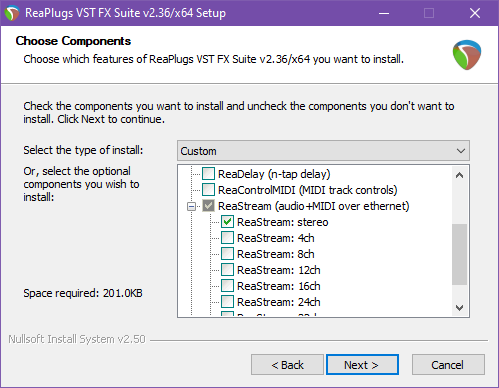
Clicking next lets you select where you want to install the plugin. All my VSTs are usually stored in C:\VST 64 and C:\VST 32 but there’s no option inside OBS to change the directory it looks in for plugins. I had to install it to C:\Program Files\Steinberg\VstPlugins to get OBS to see it. Alternative locations that might work if that one doesn’t are:
C:/Program Files/Common Files/Steinberg/Shared Components/C:/Program Files/Common Files/VST2C:/Program Files/Common Files/VSTPlugins/C:/Program Files/VSTPlugins/
Setting up your DAW
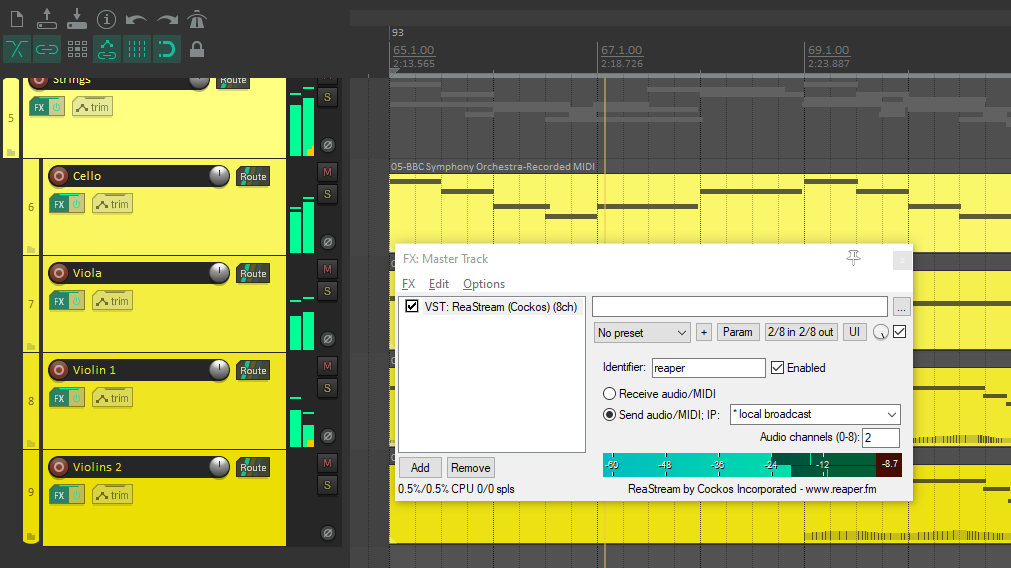
I’ll be using Reaper for this but any DAW that can run VST plugins should work. Open up your DAW and add the ReaStream plugin to your master track. You’ll get a Windows firewall alert asking if you’d like to let the plugin access your local network. Click allow.
On the ReaStream UI, we want to set it to send audio/MIDI data as we’ll be sending it over to OBS. Select *local broadcast from the drop-down list. I’ve changed the identifier box from default to reaper but it really doesn’t matter as long as the identifier in OBS matches up in a moment.
Setting up OBS
If you haven’t used OBS before, I recommend checking out this video on setting it up for screen recording. I’ve got mine set up for Twitch streaming but I also have a scene specifically for Reaper recording with a window capture source set to watch my Reaper window. The advantage of this compared to recording your entire screen is you can have plugins and other windows open but OBS will only ever see and record what’s happening in your Reaper window.
In the sources window, click the + button to add an Audio Input Capture as source. Name it what ever you like. I’m going to call mine Reaper ReaStream Audio. Select an input device that’s not currently in use. If you’re only able to select a used input then that’s OK too, we’ll sort it out later. Click OK.
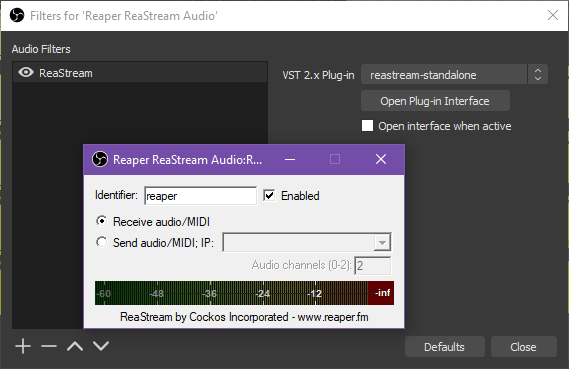
Your new audio input should now show up in your audio mixer. Right click on it and open up the Filters window.

At this point, if you’re using an audio input device that was already in use, you want to turn down the volume of your used audio input without turning down the volume of the OBS audio source itself. To do that, click the + button to add a new filter then add 2 Gain filters and set them to -30dB.
Once you’ve done that (or if you were already using an unused input device), click the + button to add a new filter and add a VST 2.x Plug-in filter. Name it what ever you like. I’m going to call mine ReaStream. In the drop-down list, select reastream-standalone then click “Open Plug-in Interface” to show the plugin UI. Windows should ask you about the firewall permissions again. Click allow. You should now have a filter looking something like this. Make sure the Identifier is set the same as what you set in Reaper.
Finally, if you play some audio in Reaper or your DAW, you should see the ReaStream plugin in Reaper send the audio and the plugin in OBS receive it. Now you can record your screen and audio, together in OBS, with no delay. Here’s an example of a track I’m writing at the moment, recorded in OBS using the ReaStream plugin.
No Sound in OBS?
If you’re not getting any sound in the ReaStream plugin in OBS, try these fixes.
- Make sure OBS and your DAW both have the same sample rate set (44.1Khz or 48KHz)
- Try a different input device in OBS.
- In ReaStream in your DAW, replace
* local broadcastwith127.0.0.1. - Try changing the name of the ReaStream identifier in OBS and your DAW.
I hope you have fun streaming and recording all your work in OBS!
Head over to the contact page and get in touch if you have any comments or follow me on social media and say hi.